This article walks you through the step-by-step process to link forms. dataDay allows forms to connect with each other and makes linking forms very easy to manage.
Before you begin:
1. You must already be registered on dataDay sign up for a free account
2. You must have added an application. Click here to learn how
3. You must have added at least two forms to your application. Click here to learn how
In this section, we’ll show you how to Link Forms based on our simple example.
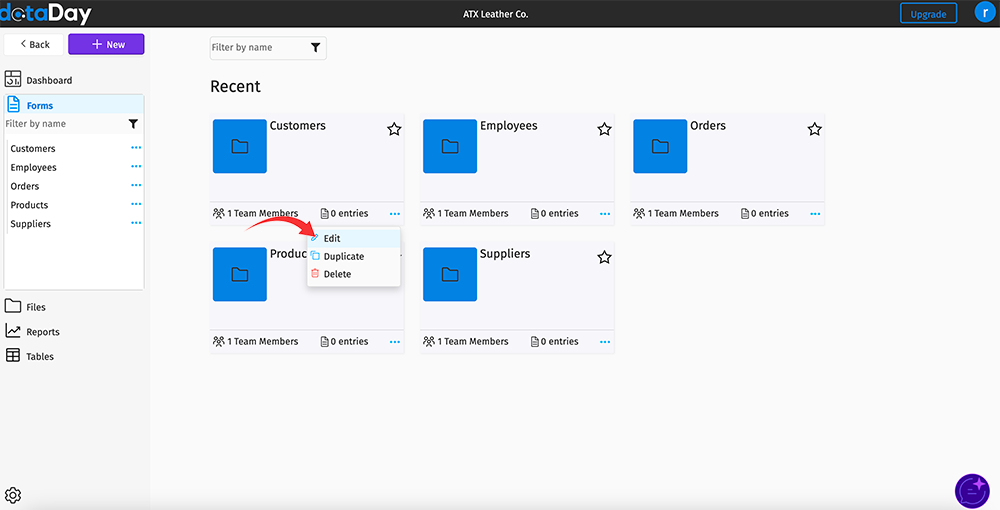
Log in to your account and select the application that has the two forms you want to link to each other. Click on the ‘Forms’ menu item in the left navigation bar and click the ellipsis menu on the form you want to link and select ‘Edit.’

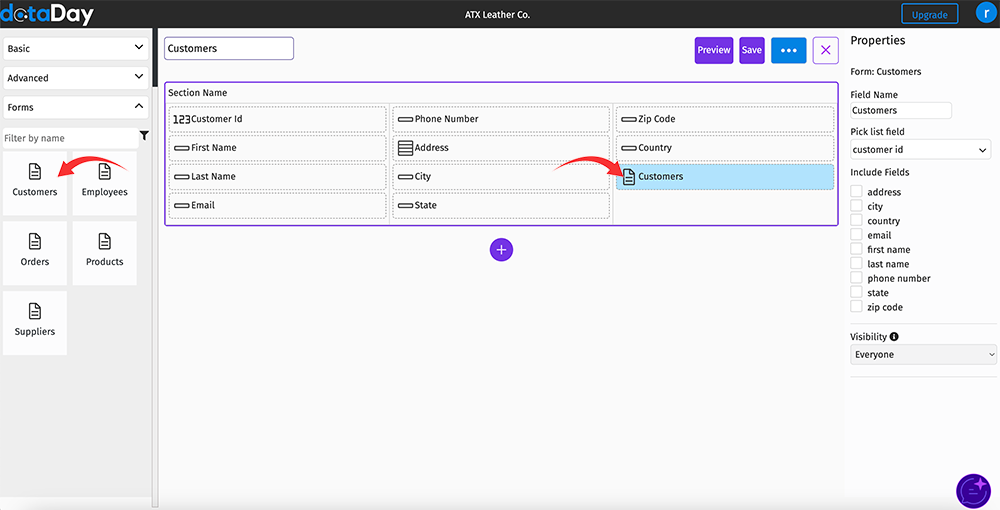
After clicking on the Edit button, you are navigated to the form builder. Use the ‘Forms’ controls on the left menu bar to drag the form you wish to link to into the desired section and column of the form.

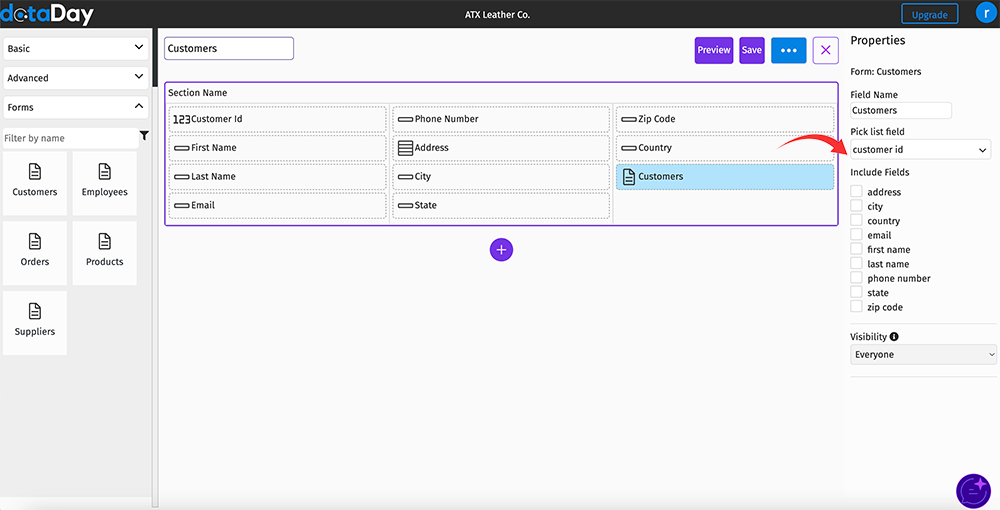
Use the right panel to name the field and which fields to include when linking the forms.

Click save to complete linking the two forms.
Note: Removing the link
Simply hover over the form control in the form editor and click the red X
